
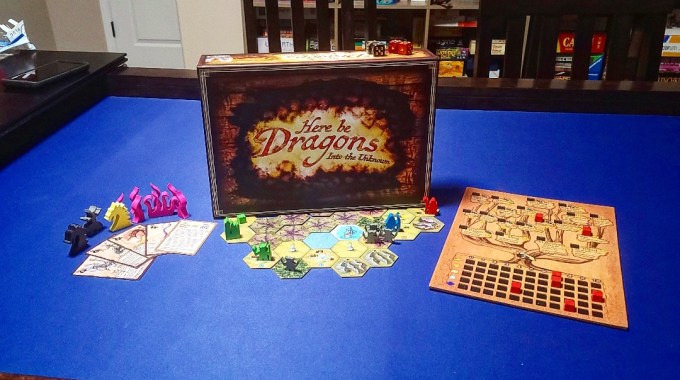
We were gifted Here Be Dragons – Into the Unknown to review by Todys Games. In this epic adventure, players are exploring a previously unexplored land with the goal of becoming the land’s ruler, though they will compete against other players for the title and will have to face different enemies in the unknown land. 10 Victory Points will decide the winner or any agreed upon number prior to playing. If you want to make it a shorter game, we found that 5 Victory Points is very short, 8 is a good medium, and the full 10 victory points allows for the fullest game since it gives more time for different events and monsters to shake up the modular game board.
Setup has a variety of options which we liked. Players decide during setup what bosses to play with. This will change how setup works since different bosses require different setups, like The Devourer and Kraken, which will affect what cards are shuffled in, for example. The bosses work kind of like expansions, giving players the freedom to choose what they might encounter. The more bosses, the more difficult the game. Each monster has their own setup instructions for The Devourer, Amman Dash the Mad Shaman, The Golden Dragon of Greed, and The Kraken. For all setups, the monster decks need seperated by decks marked 1-2, 3-4, and 5, which represent the level of the monster the player will face when drawing from that deck. The higher the level of the monster, the larger the reward, with level 5 monsters also giving a victory point if defeated.

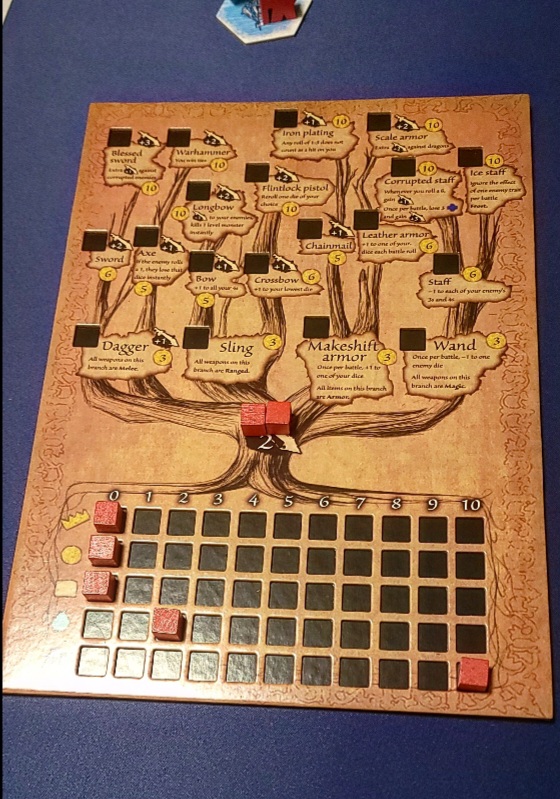
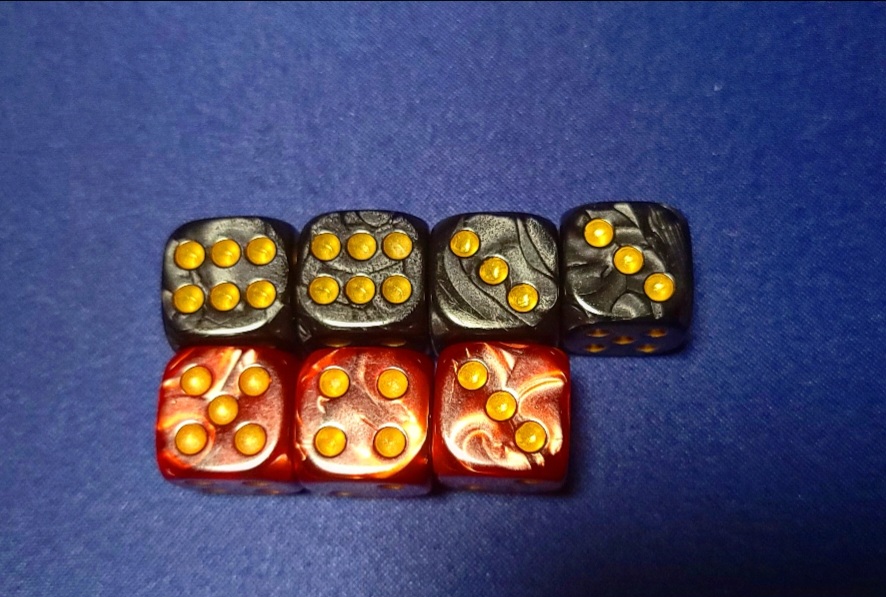
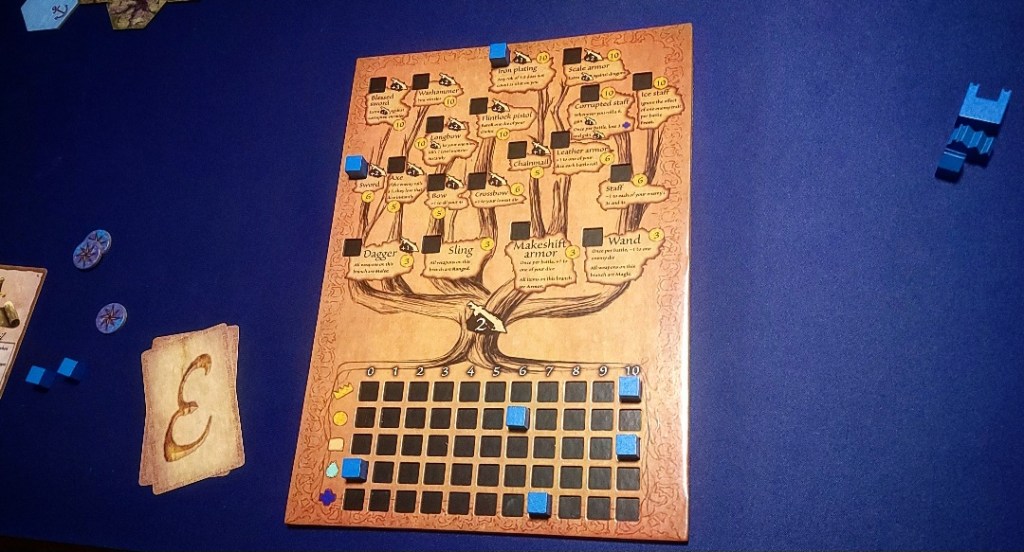
Individual players will receive their buildings, district cubes, travel marker, character, player board, and two attack dice. Each player sets up the score tracker (below the tech tree) with the cubes, marking zero victory points, gold, and resources but will have two influence points and ten health to start. Two cubes are placed on the bottom of the tech tree at the root. As the game progresses, players branch out on two different routes on the tech tree with these two cubes that will upgrade weaponry abilities to make the player stronger in battle. The black circles indicate how many additional dice players can use in a fight, whereas the descriptions indicate extra abilities. The gold circle indicates the gold cost to upgrade on that part of the tree. Players must work their way up branches, so it isn’t wise to switch branches as this would require essentially starting over. This tree offers players’ choice and strategy to how they want to try and win battles. Another note is that abilities don’t stack, so a player only has the abilities of where their cube is currently placed, not adding in the ones lower on the same branch.
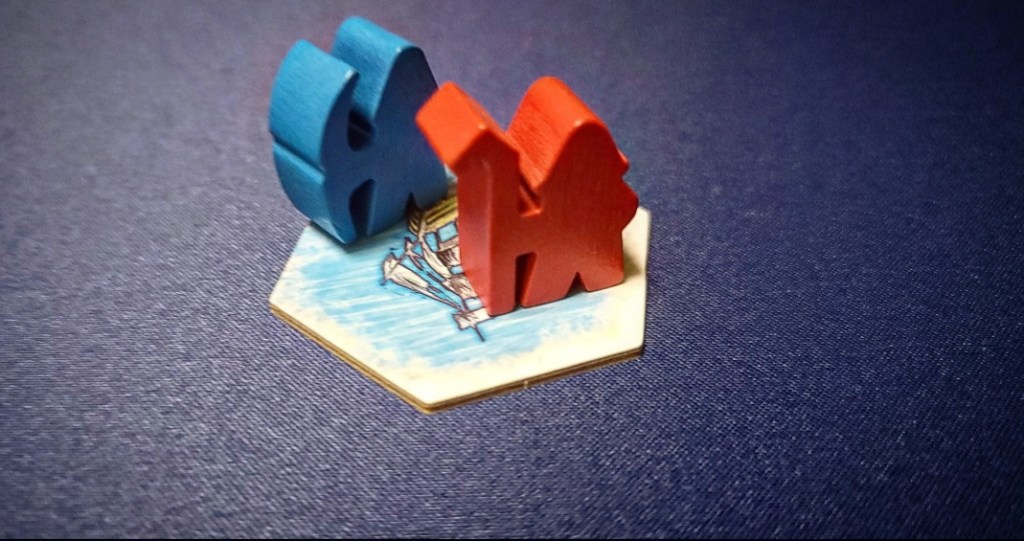
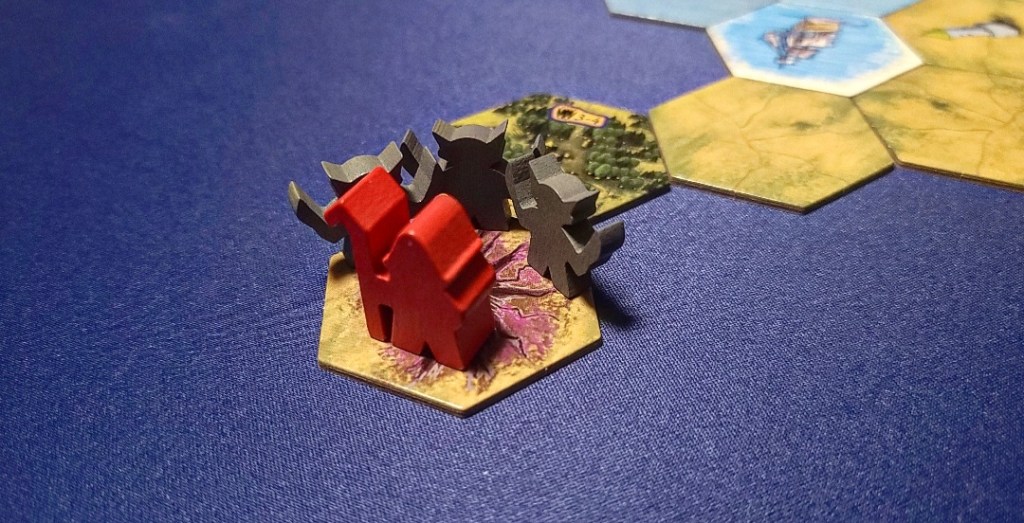
To set up the map, the starting tile (the tile with the ship design on it) goes in the center, and each character places their meeple on that tile. Each meeple is not only a different color but has a unique minimal character design to distinguish them. All other tiles will go in the exploration bag to add to the map as the game progresses. We liked this living gameboard because it creates a new experience with each playthrough. The greediest dragon or player with the highest roll may be the first player. The first player decides which direction their character goes first, by placing their travel tile on the outside of the starting tile, facing the direction they’ll want to go on their first turn, but other players may choose the same direction so this isn’t a benefit. All other players then select their travel direction clockwise.
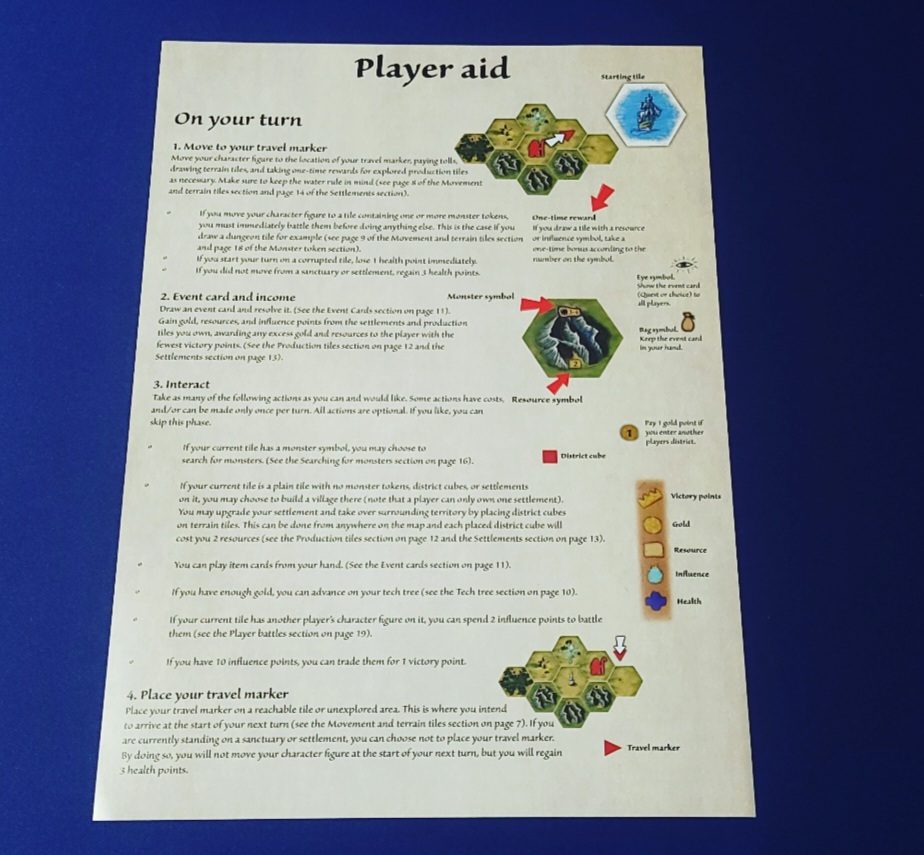
Player turns have a lot of elements to them, so it is helpful to reference the player aid double-sided sheet that each player receives throughout the gameplay. While there are a lot of options within a player turn, players essentially do these four steps: move (in the direction of the travel marker), draw an event card and get the rewards, interact if they want to (more on this later), and place the travel marker for movement on the next turn.
Movement is the first part of a player turn. The active player moves their character tile where their travel marker indicates. You cannot move from land to water unless the water tile has a harbor symbol (an anchor) or a settlement near the water (also counting as a harbor). This rule does not apply vice versa, though, as you may enter land from any tile.
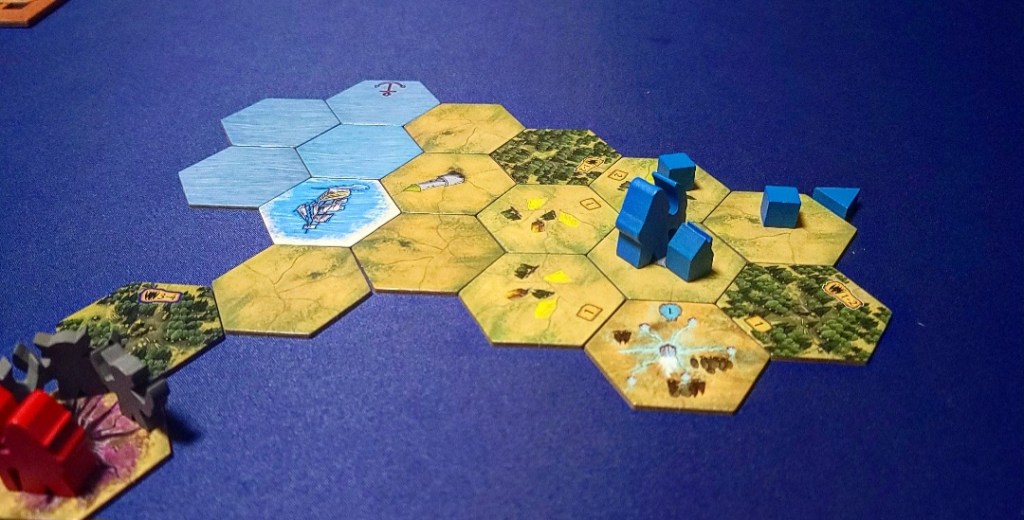
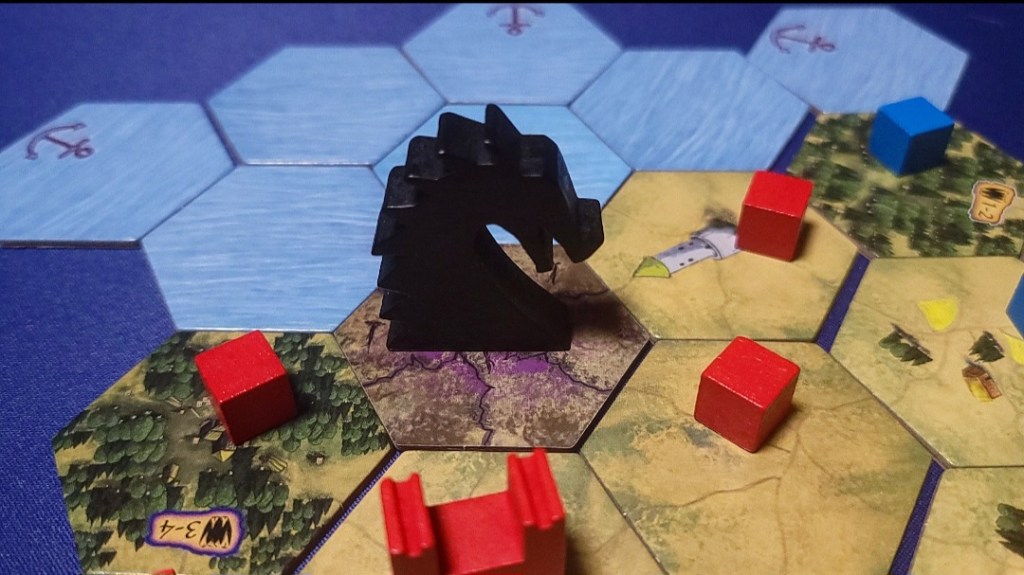
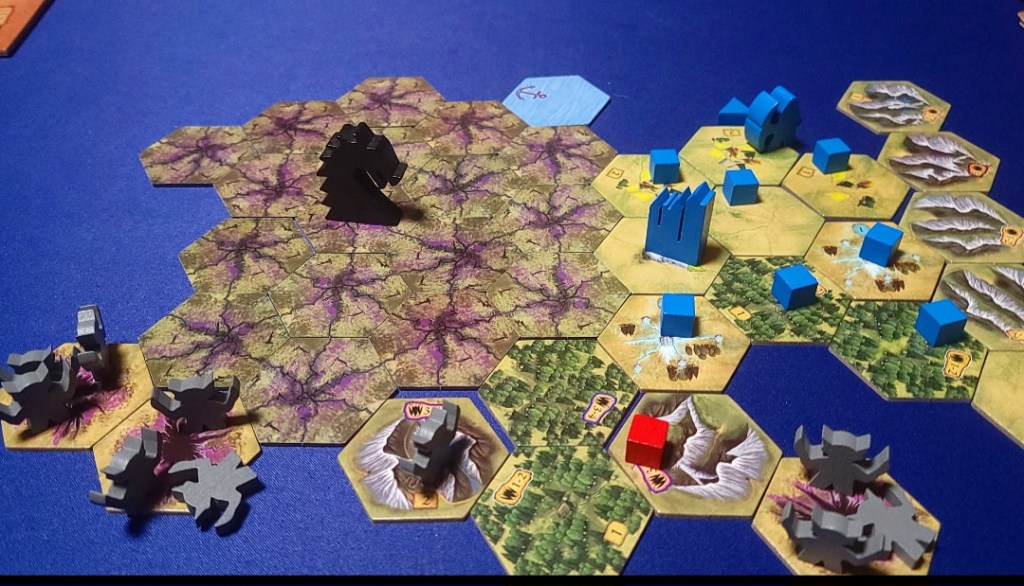
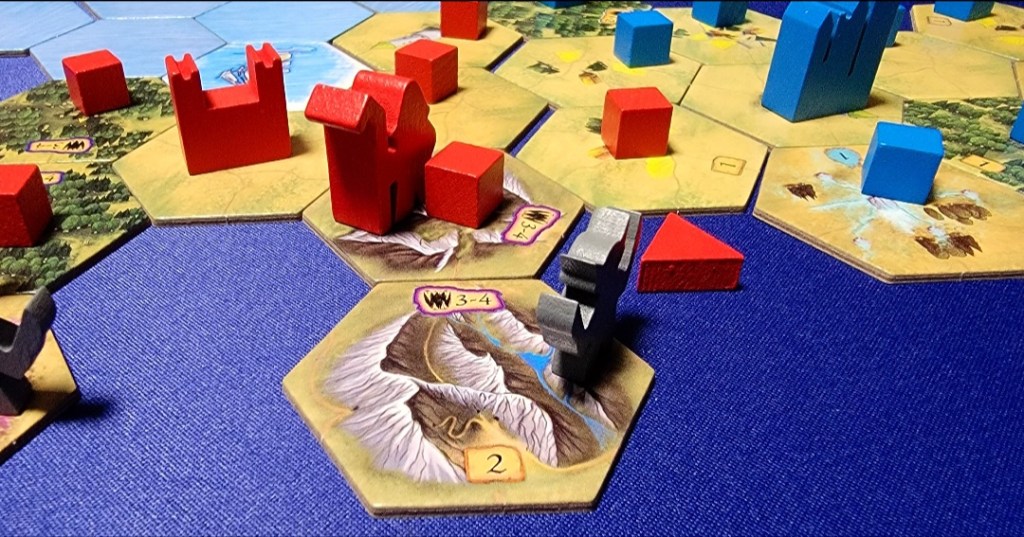
If a player enters a territory claimed by someone else with their district cube, they need to pay a toll of 1 gold to the owner of that territory. If a player starts on a corrupted tile (i.e., a flipped over tile), they lose a health point. If a player chose not to move from a sanctuary or a settlement last turn, they will regain three health points, which should be marked on their score tracker. If a player moves in a direction that does not have an existing tile, they must draw a tile from the exploration bag and place it where they are standing. If any tile drawn contains a one-time bonus (like resources or influence), they claim that reward upon drawing the tile. If a plain tile with a watchtower is placed, the player needs to place tiles from the exploration bag surrounding the watchtower tile as well. This does not repeat for multiple watchtowers drawn to surround it, and if any water tiles are drawn this way, they don’t have to follow the usual rules and can just be adjacent to the watchtower. If a sanctuary is drawn, players can use these as safe havens to stay on for regaining health points on the next turn/future revival points for any characters who may die. Other types of cards that can be drawn are forest and mountain tiles (where players can search for monsters), dungeon tiles (contains three monsters that must be battled), and water tiles. There are also production tiles among the various types of tiles (farms, sawmills, mines, and sanctuaries) that produce resources (marked by symbols on the tiles). If a water tile is drawn, it must be placed next to another water tile if possible. If it can’t be placed adjacent to another water tile, it must go where the player travel marker is and the player will place their character to the left or right of the new water tile, even if they need to draw a tile from the bag to create that space. That same player will continue to draw from the exploration bag until they draw a tile they can place their character on. If the player is already on a water or harbor tile, it is ok for them to land on the new water tile. There are many movement and placement rules, so we often had to refer back to the rules until we were used to these.
If a player moves their character to a tile with monster tokens on it, battle is required unless the player successfully flees. Only prior to a monster battle can a player attempt to flee by rolling a dice, which has to be higher than three to be a success. If not, they must battle. This is also true if a dungeon tile is drawn because that tile spawns three monsters. Monsters will never spawn on settlements or sanctuaries. As you can see, moving has a lot of consequences and rewards in Here Be Dragons. To battle on a dungeon tile, the initially placed tile gains three monster tokens, and the player entering it fights one monster of each level set (1-2, 3-4, and 5), revealed and resolved one at a time. Each defeat removes a monster token, and each battle with a monster token is considered individual and resets attack dice available, traits, and spell effects. There can’t be more than three monster tokens on a single tile. We thought this limit was great because three monsters is truly a hefty dungeon feat. It can be very detrimental if one draws a dungeon tile early in the game with few resources and fails to run away.
In battling, the player battling needs to roll the highest numbers to win. A different player should control the monster if possible (i.e. roll the monster’s dice). Monsters have optional abilities the character rolling for the monster may use listed on the card as well. The player fighting the monster can use item cards to help them. The base dice are two dice, but the tech tree may indicate additional dice the player has access to. Opposing parties (in this case, monster vs. active player) will roll all of their available attack dice and organize them from largest to smallest. Competitors place their dice in a line, one on top of the other. The competitors then compare each set. For the highest roll, for example, if one player rolled 6 and the other 5, the 5 would be removed. Any ties remain. This goes on for each set. If both opponents have any remaining dice, they reroll and set up the lines again in the same way, comparing sets until one loses all their dice. In these battles, it is very beneficial to have more dice than your opponent. If a player loses to a monster, they take damage equal to the monster’s starting strength and put a monster token on the tile and then that player can move to an adjacent existing tile even if the only option is a water tile. If they win, the player gets the listed reward. If the player succeeds, no more monster tokens are placed. If they fail, all of the tokens are placed back, and the next player to enter the tile draws new monsters to fight. Any tile that has a monster token placed on it will have any existing district cubes on that tile returned to the player who placed them.
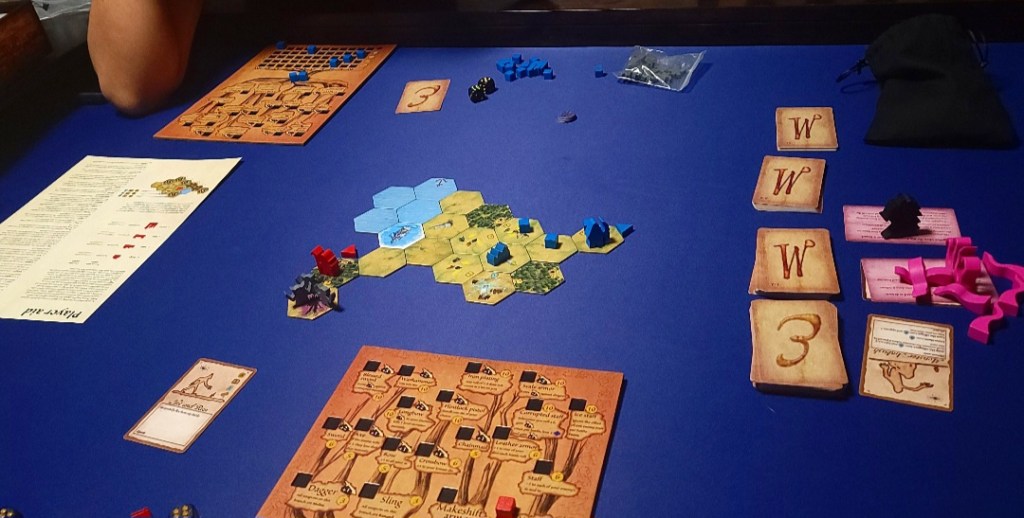
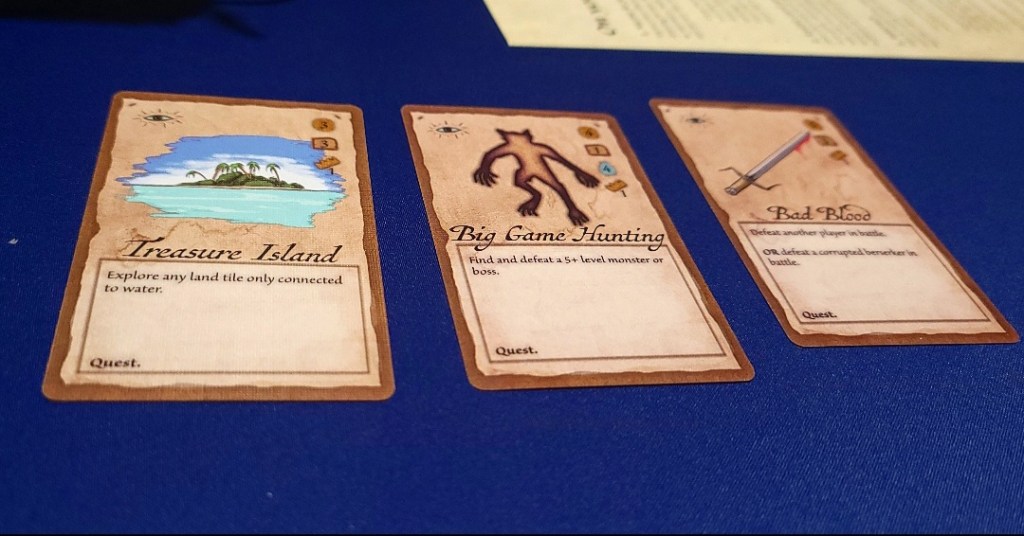
After movement and all of the affects are resolved, the second thing the active player does on their turn is draw an event card. They may draw a facedown (bag symbol) or faceup (eye symbol) card. The facedown cards become the player’s item (limit of 5 items per player), whereas faceup cards are visible to everyone and their effects are used once then discarded. Event cards can hold Quests (open to all players to complete with only one victor), choices (which lead to specific outcomes), or items (beneficial to the player who drew it).
Then, the active player will look at the settlements and production tiles they own (indicated by village and district cubes placed) and gain the owed amount of gold, resources, and/or influence points. These are very important as all three lead to advancement in the game. If they have any excess gains, those go to the player who has the least victory points. We didn’t like sharing with the player with the lowest points but found out it doesn’t have too much influence on the game outcome to be unfair.

The third action players take on their turn is interacting, which encompasses many possibilities. This is the only action that is optional in the game, and players may do as many interactions as they want as long as they can afford them.
During this phase, if the active player is on a plain tile they can make their village there if they wish for free and gain the one-time reward right away (1 influence point, 1 victory point). Villages will incur an ongoing income of 1 gold point each round on subsequent turns. During the interact phase, the active player can expand their settlement depending on the number of district cubes they’ve placed on adjacent tiles to anything that is their own player color, placing or moving district cubes has the cost of 2 resources per cube. The expansions are towns, forts, and citadels, each also having their own one-time reward and income per round. Each also has a number of connected district cubes that have to be in play (+3 connected cubes for each upgrade). If the settlement is ever removed by another player/action, it doesn’t have a rebuild cost for the same type of settlement itself. If cubes are not connected to the settlement in some way, they do not produce income. The unique part of this is that the player doesn’t have to be nearby to expand the settlement they just need to pay the cost.
During the interact phase, if a player searches for a monster on a tile with monster symbols, they roll a die (anything 3-6 is a success and they can choose to fight a monster of the indicated level or they may flee).

Other ways that players can interact are by playing item cards, advancing the tech tree (for gold), trading 10 influence points for a victory point, and/or battling other characters with more victory points than them on the same non-settlement tile (costing two influence points– and player vs. player works like player vs. monsters except in pvp anyone even outside of the fight can contribute item cards to the battle, the victor takes a victory point from the loser, and the loser lowers their health by the number of their opponents starting attack dice). The interact step is where a lot of the strategy lies because there are so many choices a player can make to advance their character in this phase.
The last action players take on their turn is placing their travel marker to indicate where they want to move on their next turn unless they are on a sanctuary or settlement (whether theirs or someone else’s) and do not want to move so they can gain three health points on the next turn. The travel markers can be on any tile next to their character, however a player can move further in a couple of instances. If a player is on a plain tile and there are two other plain tiles in the same unbroken row the travel marker can be placed on any of those plain tiles or just beyond the last plain tile in the row. The same is true for a sequence of water tiles. Then the next player will take their turn and so on and so forth clockwise.
If a character ever is stuck with absolutely nothing they can do or dies in multi-player mode (0 health), they lose almost everything– settlement, district cubes, gold, resources and their tech tree will have one branch downgraded. If a player dies, they also lose their item cards and reset their health to 10. They then place a travel marker so that on the next turn, the player can rejoin on an existing tile if they started over from stuck or the closest settlement if they died (not paying the toll next turn). The stuck or previously dead player may rebuild their same sized settlement at no cost (minus any district cubes). While dying is obviously not ideal, setting up from this stage wasn’t difficult and wasn’t unrecoverable as a setback.
For even more immersion into the theme, players can also look into the Questbook after a few playthroughs, which mainly elaborates on different event cards with rich storytelling. This is optional for gameplay.
Language Barrier Playability: Not doable. While anything involving dice rolls doesn’t require language, all of the card text and weapon abilities require translation.
Replayability: Decent. We think this game is good for once in a single sitting since it has so many elements to it.
Artwork: Classy. The cards and player board have a more standard coloring, whereas the individual monsters and player colors pop. The wooden token shapes stand out from other games we’ve played.
Quality: Excellent. The wooden tokens are well made, and the player boards and cards are sturdy. The player boards and tech trees also have nice slots for the district cubes.
Strategy: Unique and different for each playthrough. There is strategy to fighting or fleeing monsters, placement of district cubes, decisions on what to upgrade on the tech tree, and more.
Instruction Manual: Confusing. The instruction manual does cover everything, but the way that it is laid out is maybe too elaborate. There are a lot of exceptions to the rules and they’re covered in different parts of the rulebook, so it took us awhile to learn them.
Organization: Great. Everything has a bag, a spot, or just generally fits in the box how it should.


